
Right, let’s dive right into campaign game#2!
Last time…
Tanit’s Talons, our lovely mercenary company, was asked to help kick a contingent of the Jade Falcon clan off a planet at the behest of the local merchants. So we made planetfall right at an outpost to meet with the locals, let them know that we’re here to help. Enemy recon elements to have a look at us, a skirmish broke out, in the end we managed to shoo them away.
Not without some losses though. Lt. Priss Cadillac (Fire Lance commander) was gunned down by those no-good, dastardly hover tanks. She survives just barely (and will return, no worries. Probably with a bad-ass eye patch.).
Now we set our foot on the ground and established a bridgehead on the planet, but surely the Jade Falcons are out for revenge.
Mission 2
We spent a bunch of points on repairing the ‘mechs. The Awesome is left untouched for now, because it’s really, really expensive to fully repair a downed battlemech of that size.
We now have the choice of either digging in at the civilian colony and defend it against further Jade Falcon attacks or take the fight to the enemy and attack a Jade Falcon underground outpost. Cpt. Lyndra Tanit calls her lance leaders together to discuss further steps. Lt.Lee and her sit together in the meeting room (a back room of the local bar), Lt.Cadillac partakes via voicecom from her hospital bed. She opts for an immediate attack against the nearest enemy facility, but is overruled by Tanit and Lee on the grounds of building up further goodwill and for fear of an enemy ambush.
The Scenario
Cue the montage music of your choice, we’re setting up defenses! The scenario gives us the option to spend supply points on setting up prepared positions for mechs (to deploy Hidden) and/or deploy two defence turrets. Having learned that Clan Mechs are not to be trifled with, we go for both.

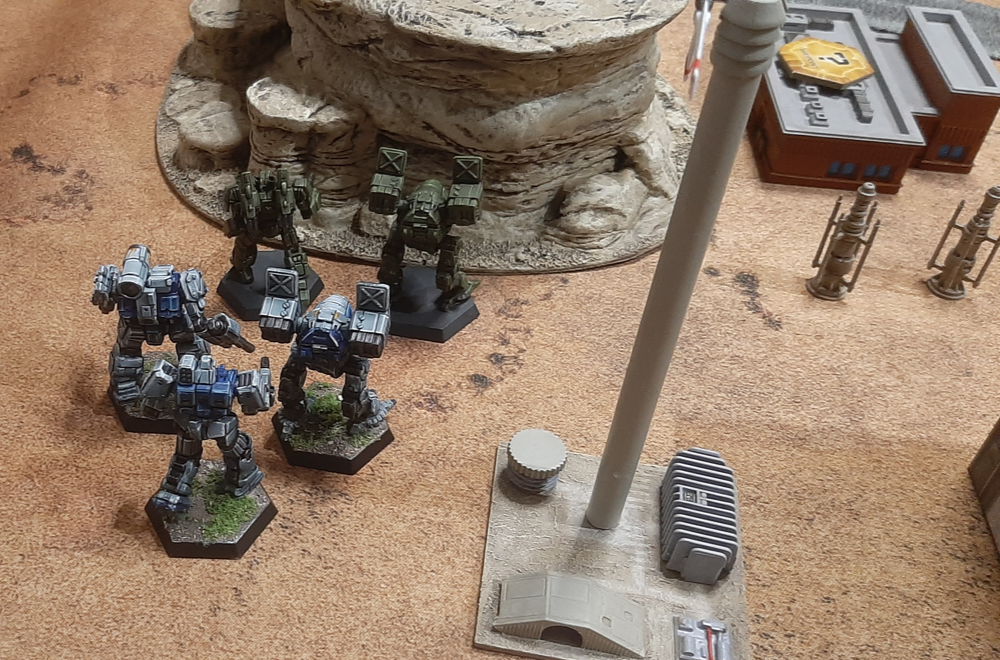
Speaking of deploying things, this scenario allows us to deploy a lot more than in the first game. Cpt.Tanit deploys her full Command Lance (played by Cpt.Shandy), Lt.Cadillac’s Fire Lance (played by yours truly) deploys everything but the Awesome (and its pilot, for both are banged up). Lt.Lee of the Scout Lance (played by Virago) deploys in his Victor, accompanied by Delacroix in her Catapult and Sakai’s Phoenix Hawk.
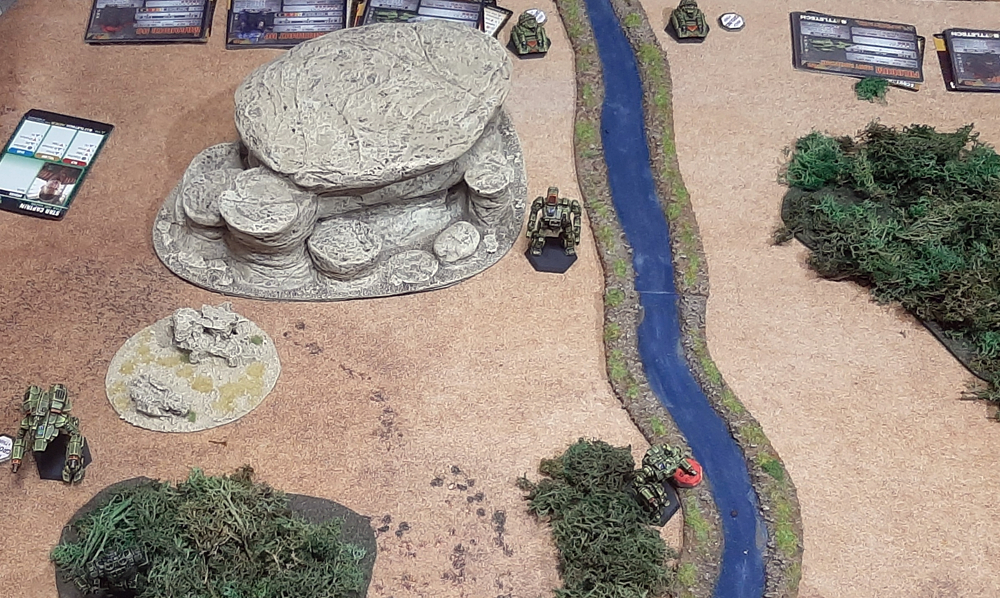
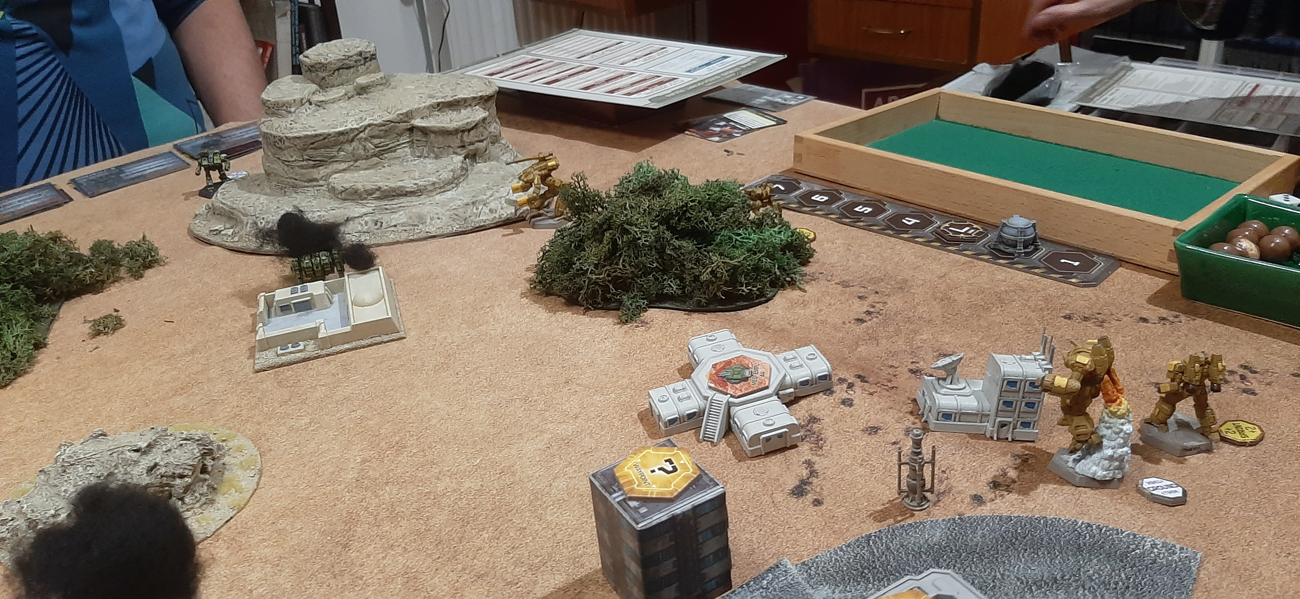
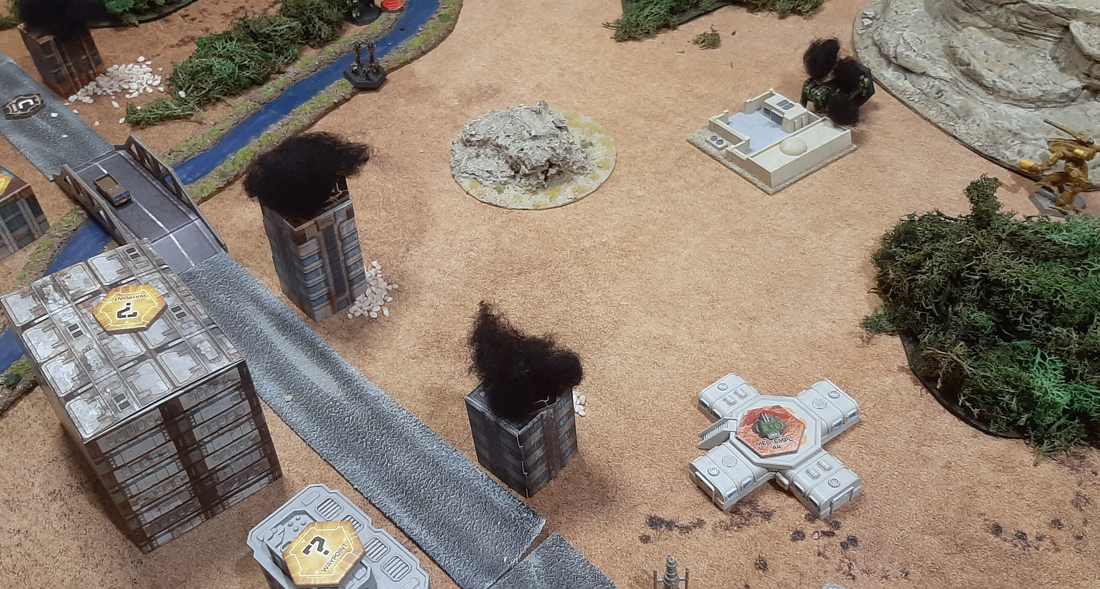
The table looks as such:
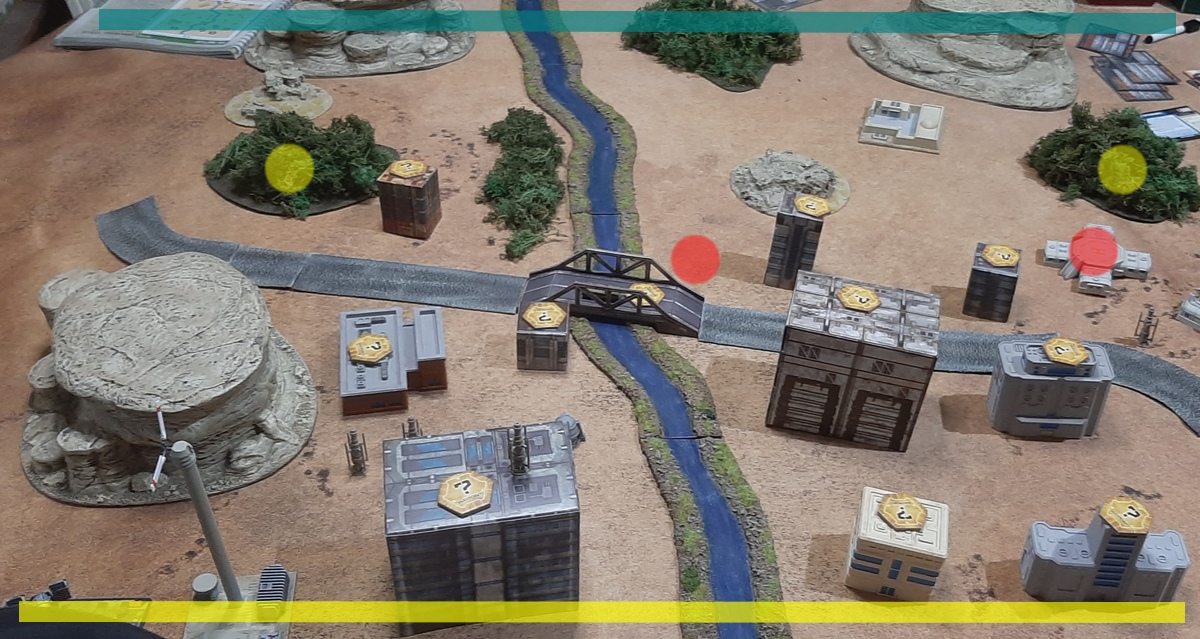
The scenario is all about preventing damage to civilian structures. We start with a certain number of points which get reduced by any civilian structure being destroyed. The little tokens atop the civilian structures get turned over once the building in question takes damage, which triggers a little event. The tokens are placed blindly, so each time you play the scenario the events will trigger at different points in time. In addition there’s one such token on the game turn counter, triggering an event at turn#2.
The Game
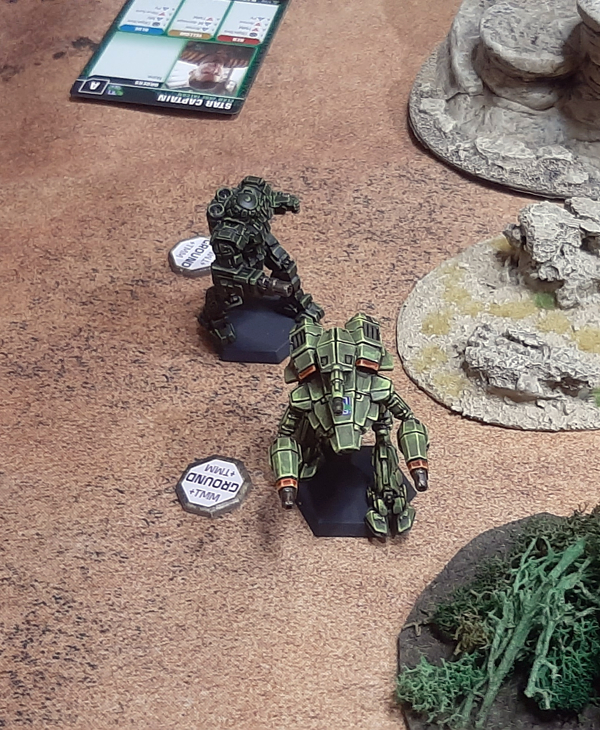
Our leader deployed her Command lance at the centre-right, Cpt.Tanit herself deployed her Marauder in hiding at the far right forest.
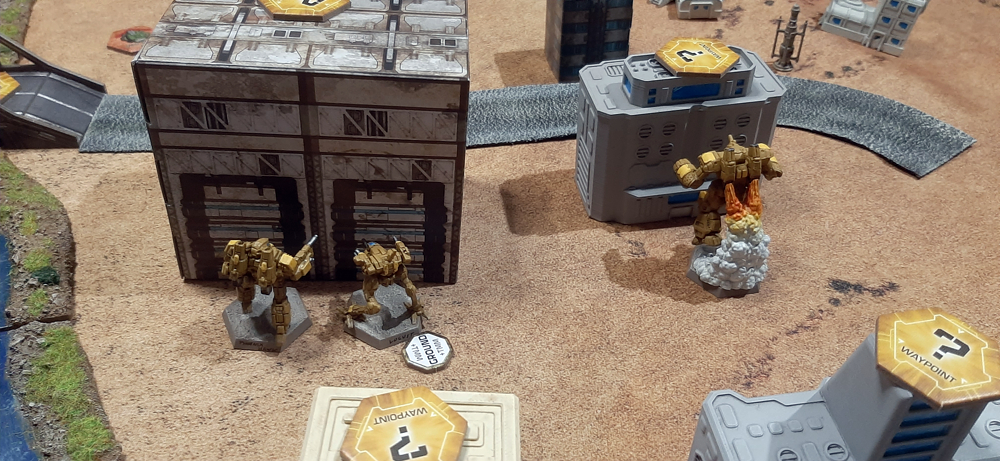
Of the Fire Lance, the Masters’ siblings Catapult and Thunderbolt as well as Zucchini’s Wolverine deployed behind a hill along with Delacroix’ Catapult and Sakai’s Phoenix Hawk, effectively forming a long-range battery with a bit of back-up. All on the far left flank. The Scout Lance’s third ‘mech, Lee’s Victor, deployed in the leftmost forest, hidden in a prepared position.
First turn we didn’t do much, except observe the way the clan forces entered the table. Much to the chagrin of Cpt.Tanit, who did not want any civilian structures get blown up by the rampaging Jade Falcon horde.
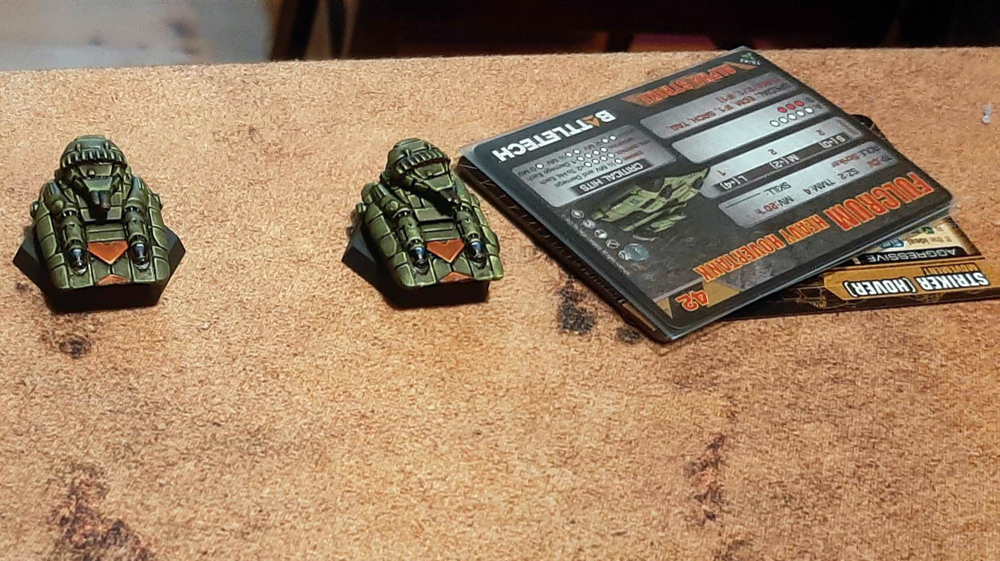
…and quite the horde it was. While in the first scenario we only had to deal with two hovertanks, a heavy and two light ‘mechs, this time the enemy star captain launched a full attack, featuring 4 medium to heavy ‘mechs, once again two of the Fulcrum heavy hovertanks which caused so much trouble last time we played and a lighter ‘mech.
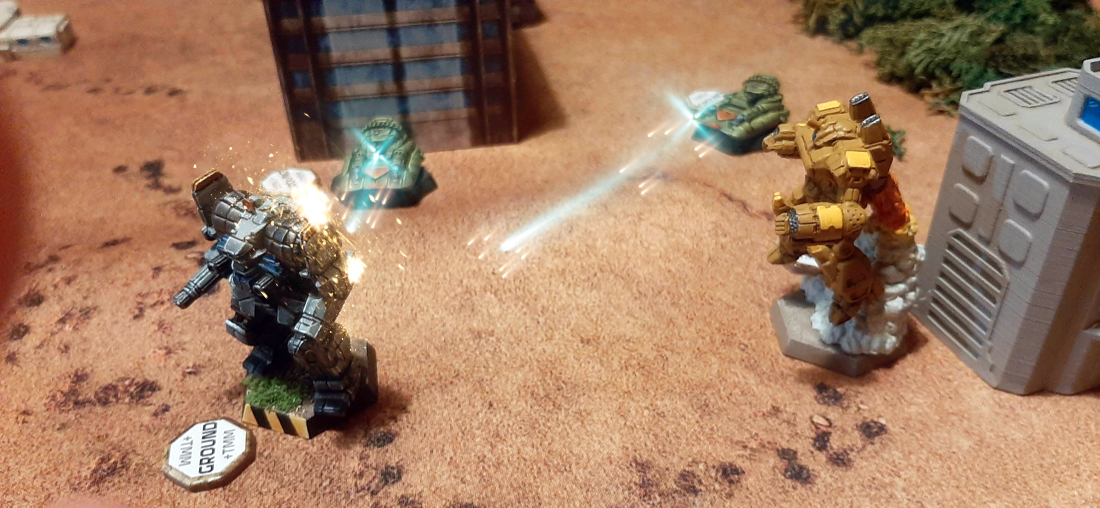
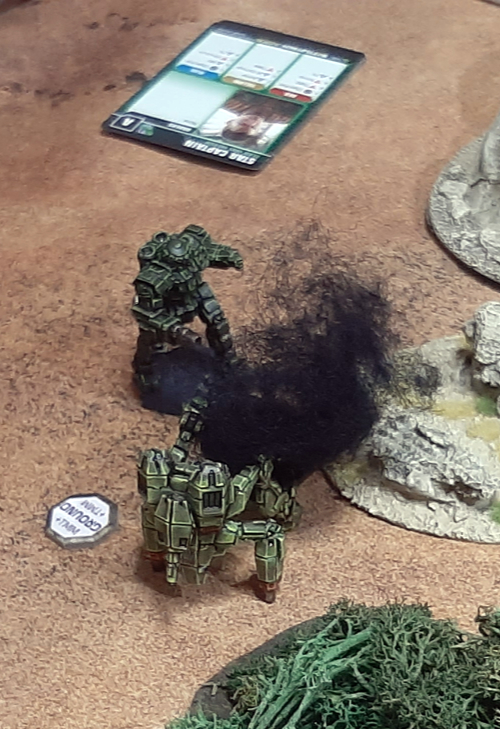
But we were more this time as well, and most of all: Virago and Cpt.Shandy had a plan. So we held back on showing ourselves on the first turn, we’d pick our fights and try to gang up on the superior enemy pilots and machines. We let the enemy keep themselves busy attacking our defense turrets. They in turn acted as spotters for a salvo of indirect long-range missiles we hit a cocky enemy Rifleman with.

No major damage, but at least something. Cpt.Tanit singled him out as her #1 priority target. She hopped out of hiding and moved behind the mesa to make herself a nuisance.
The rest of her lance follows suit to engage the Rifleman as the monster advances.
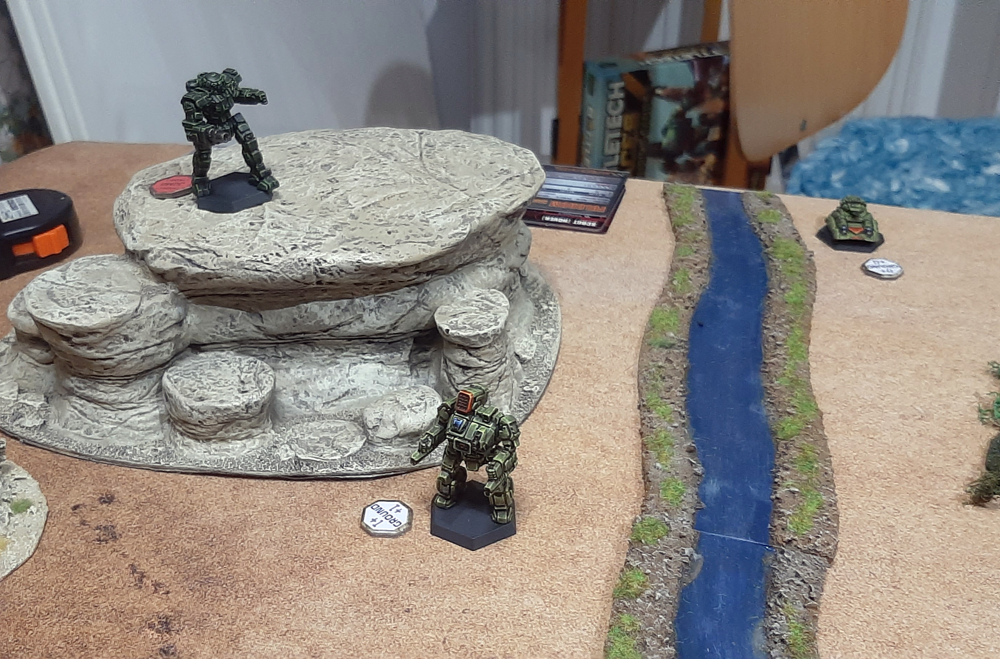
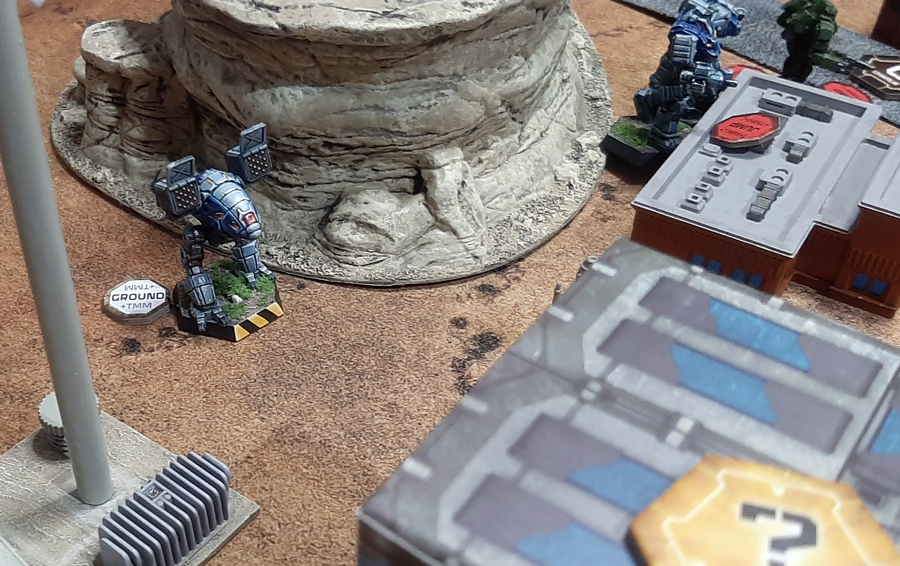
At the other flank, an enemy Marauder IIC moves past the forest, springing our trap! Out of his cover, Lt.Mohammed Lee darts behind the ferro-fibrously fortified fiend.
…as our bunched up troop from behind the hill shuffle to get a line of fire at the Marauder and unload everything they got.

….until it’s finally destroyed.
…the victorious mechwarrior activates the jump jets and gets himself in surprisingly safe elevated position.
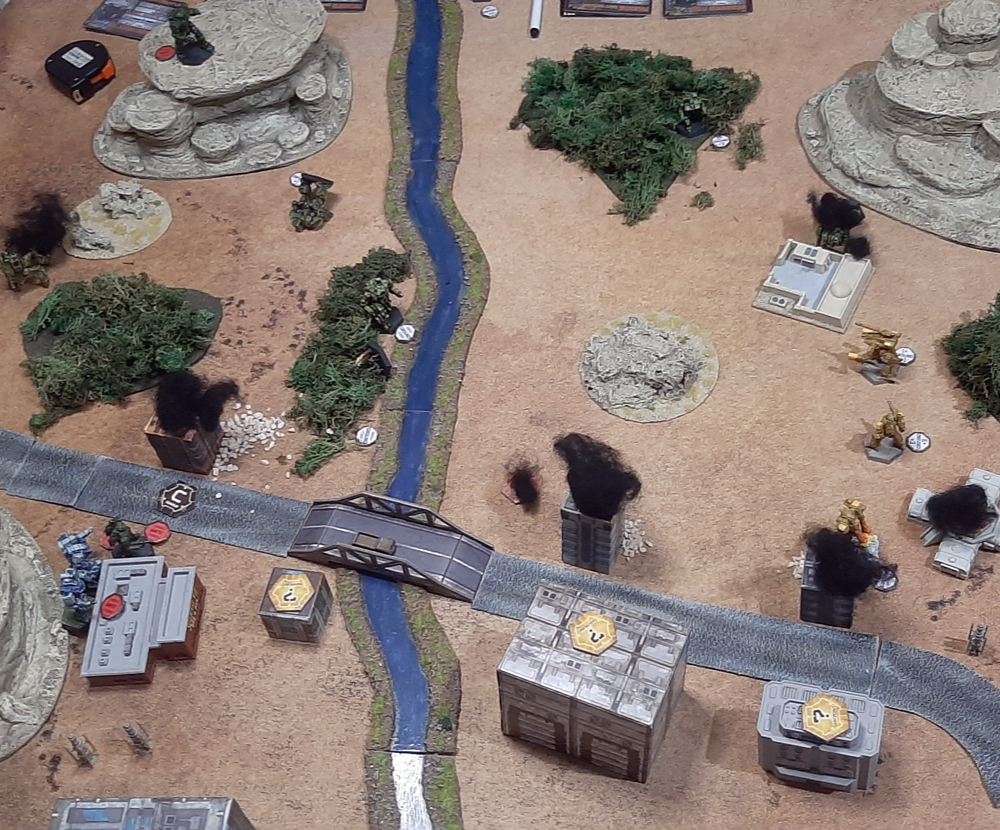
The clan forces don’t even bother much with getting rid of our mechs at first though. Their goal is to punish the local civilians for seeking help, so they ruthlessly attack the town.
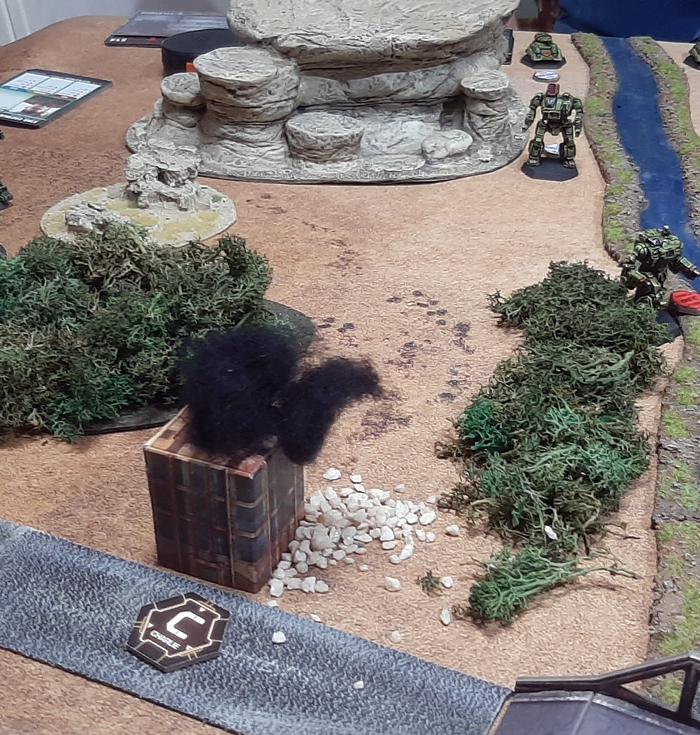
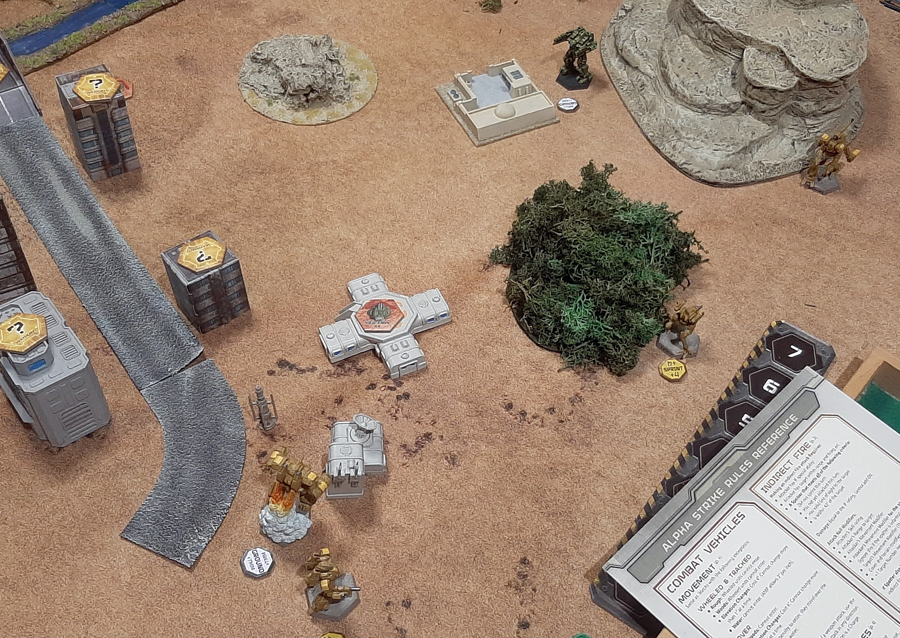
The Summoner hops into cover along the river and a squad of Elementals hop off the machine’s hull and wreak havoc.
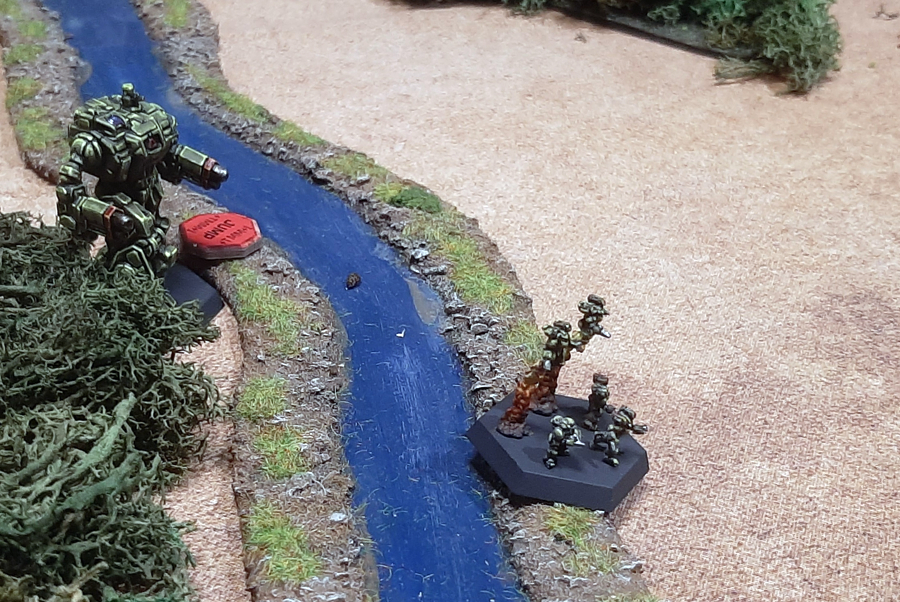
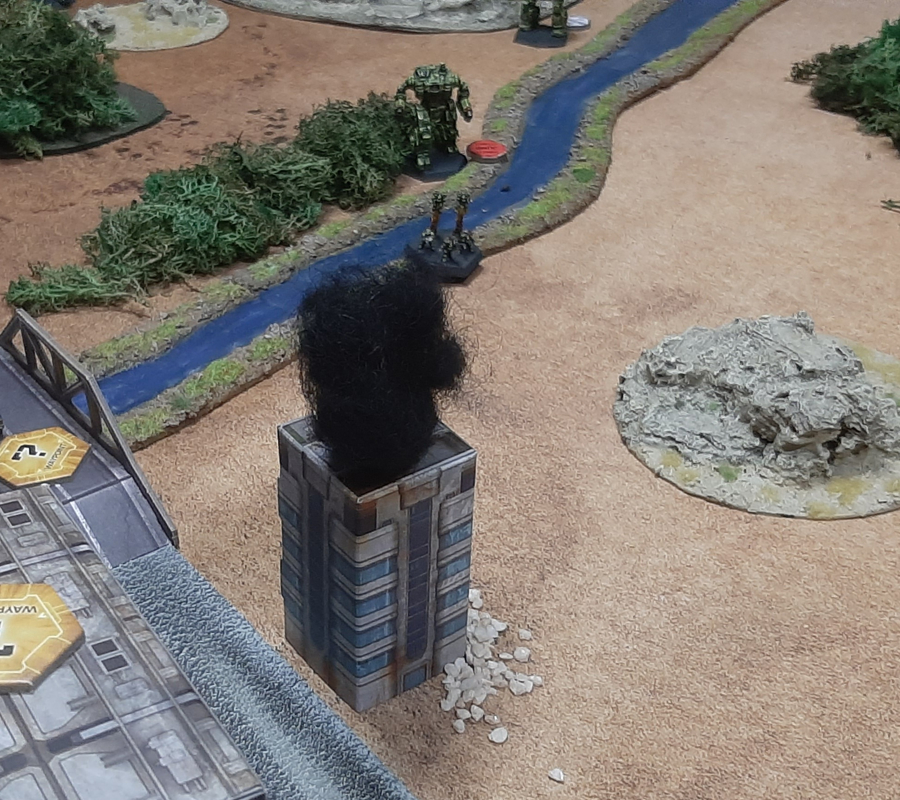
They blow up one of our defense turrets and the building behind it.
Enraged by such behavior Tanits leads her lance against the Rifleman…
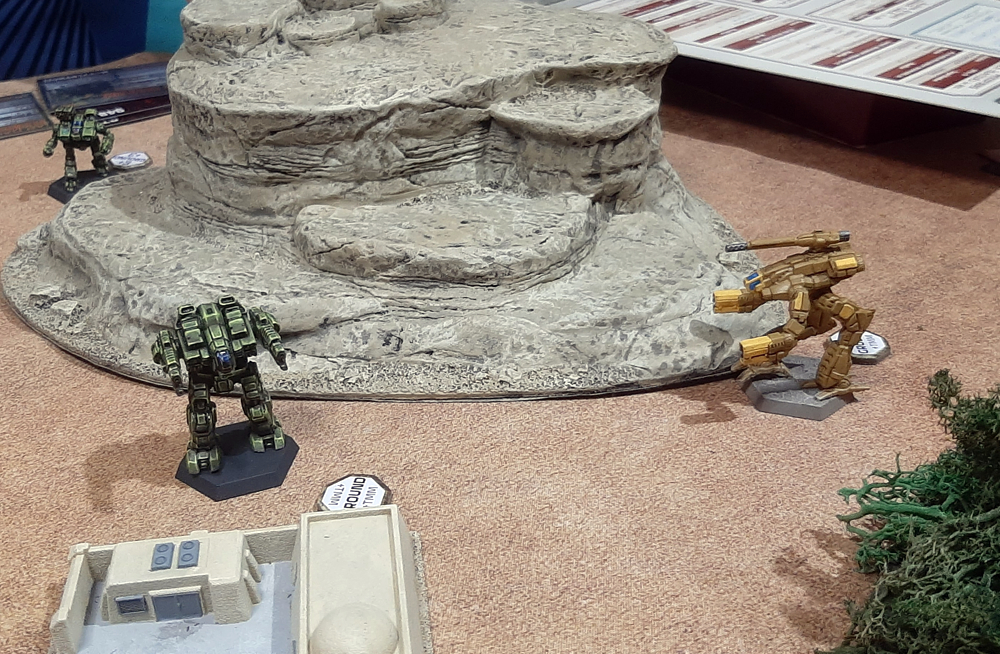
…and brings him down.
Sadly they can’t prevent further damage to the civilian buildings.
Back at the left flank, our group of mechs of the scout and fire lances regroup to engage the relatively soft Elementals and disperse them.

After some very well-placed shots by Mohammed Lee and his comrade Nancy Delacroix even cripple the enemy Thunderbolt II, the Jade Falcons are forced to retreat.
Tanit’s Talons are victorious!
Aftermath and Thoughts
Now that went well, didn’t it! Okay, not forthe owners of real estate on the northern side of the road, but we suffered no losses this time by being more cautious, very deliberately picking targets and taking them out while staying far away from anybody we did not want to engage. And it even worked!
The defensive turrets played a big part in this. What’s remarkable is how different the Fulcrums acted this time around; being very cautious, advancing slowly and taking opportunity shots at targets as they came into sight, rather than zipping around like crazy like in our first game. Apparently the trick is to stay away from them as to never even give them the opportunity to make use of their impressive speed to get behind your mech.
I continue to be impressed with the scenario design in this campaign and the little narrative bits. Apart fom all the little choose-your-own-adventure style things between missions, the excellent Waypoints system during missions, there’s just fun little fluff bits between missions. Like this time prior to the scenario we switched to a little scene at the bad guy’s headquarter (like in Jagged Alliance 2, when we look at what the evil lady is up to in her palace) as he shouts at his underlings. Excellent.

After successfully finishing our second sortie, we gained the tag “Goodwill with the Locals” or something like that; very eager to know what that means in game/campaign terms.
As a side note, on Discord I was asked about how the AI activation system works in detail. To be honest, I have no idea. I don’t own the Scouring Sands set myself. The Goonhammer article on Scouring Sands gives a rough idea on how the system works, or at least which the moving parts of it are.. I’ll try to learn more about the system, but right now I’m probably not the best person to explain it. Maybe I will be at a later point.
Either way, this scenario sold me more on the whole Aces / Scouring Sand thing than the first sortie. Well thought-out stuff, by the looks of it, and very well presented. In general I’m suspicious of traditionally well presented boutique wargaming as opposed to slightly rougher, DIY stuff, but this seems to work.
Hope you enjoyed this little battle report and stay tuned for sortie 3!
Great work with this website, I love your exciting battle reports—they really motivate me to paint and play again myself.
I have one more question:
Will there be in the future reports about Chain of Command V2?
Greetings from Germany
Thanks very much, Philipp! Yeah, it’s all a motivation tool for myself as well. 😀 Hoping to get to play CoC2 soon! I got the rulebook in November; there’s a few photos I took in there as well. As soon as I get to play CoC2 I’ll do a review. Have you played yet?
No, not really..
We’re playing version 1, and step by step I’m translating the rulebook into German and incorporating it into the (unfortunately too rare) games.
That’s why I’m hoping for a nice battle report from you about v2, which will motivate me to push this project forward more quickly. 😀
I’m a big fan of your website, because in my opinion it’s something quite rare. I prefer to take the time to calmly read such vivid and action-packed reports, since there are more than enough of these as videos, but too few in written form. The same goes, in my opinion, for painting tutorials — bemalminis.de is a great example of this. 🙂
Oh yes, I very deliberately hold on to a blog over videos. Which never quite made sense to me for depicting static things such as miniature games anyway. They’re invasive on the senses; you can’t do anything whilst watching a video either, like listening to music. A blogpost you can browse on your phone wilst sitting in a bus without having to put in earphones.
I’m also very happy to get feedback on posting stuff in English and German (assuming you meant a German version of a possible CoC2 post as being inspirational 😀 ); it’s quite a bit of extra work, but I often run into people who only read the German versions as well. So it’s cool.
Speaking of which – very cool that you translate CoC into German. That’s always been a thing that bugged me – the lack of translations of all these wonderful rules sets into German. Many, many years ago I emailled back and forth with Richard Clarke a bit about this, and he let me know that it’s financially just not feasible, because you need a properly trained translator if you want to publish the rules properly and those are expensive. Maybe with advances in AI (which in general I hate with a passion, at least the generative AI toy rubbish we see people use on photos and text so naively every single day), we’ll see some proper powerful translating software. I’ve grown proper desillusioned with technology for end-users, but the one thing I hope for for the future is proper universal translators.
Well, anyway. All the best for your German version of CoC and that this will help you get more games done! I’ll see if I manage to get a CoC game in at some point in the near-ish future!
Wow, you put that really well! Especially nowadays, our senses are just overloaded, so the tabletop hobby is perfect to counteract that. And no, I didn’t mean you should post a separate German CoC battle report—websites can translate pretty well these days 😀
I also agree with you about the whole AI topic, but going into more detail would be a bit much here 😉